CAD
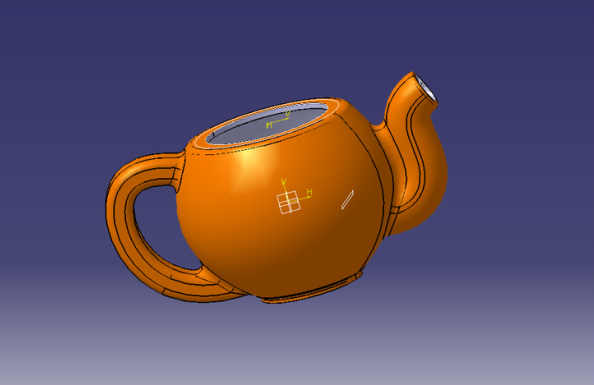
I used CATIA V5 in order to create a digital model of my tea pot. It took me some getting used to the CATIA interface (which is not particularly user-friendly), but in the end, I managed to create a rather precise representation of what I had in mind.
Making the Teapot
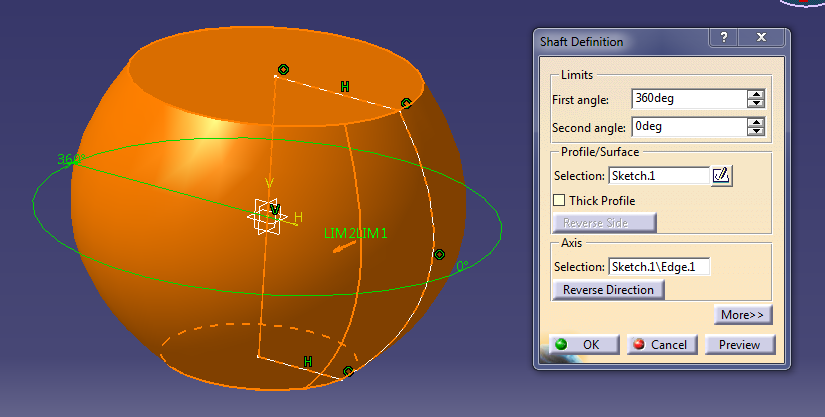
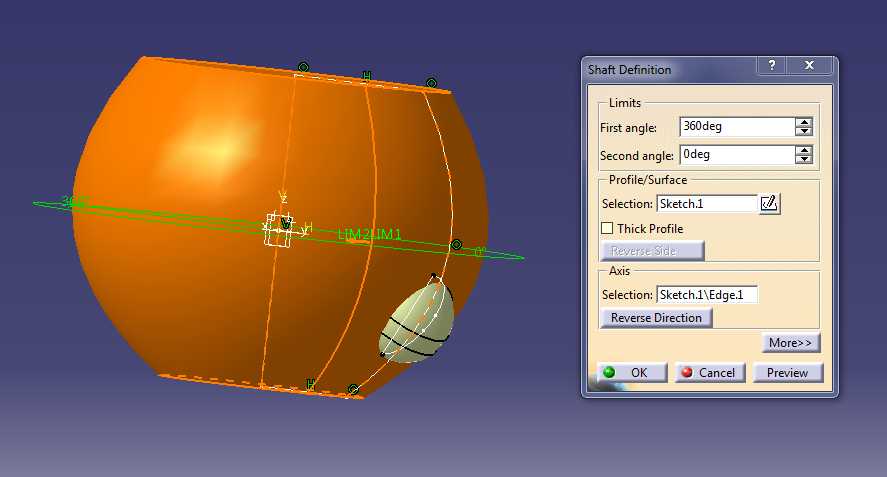
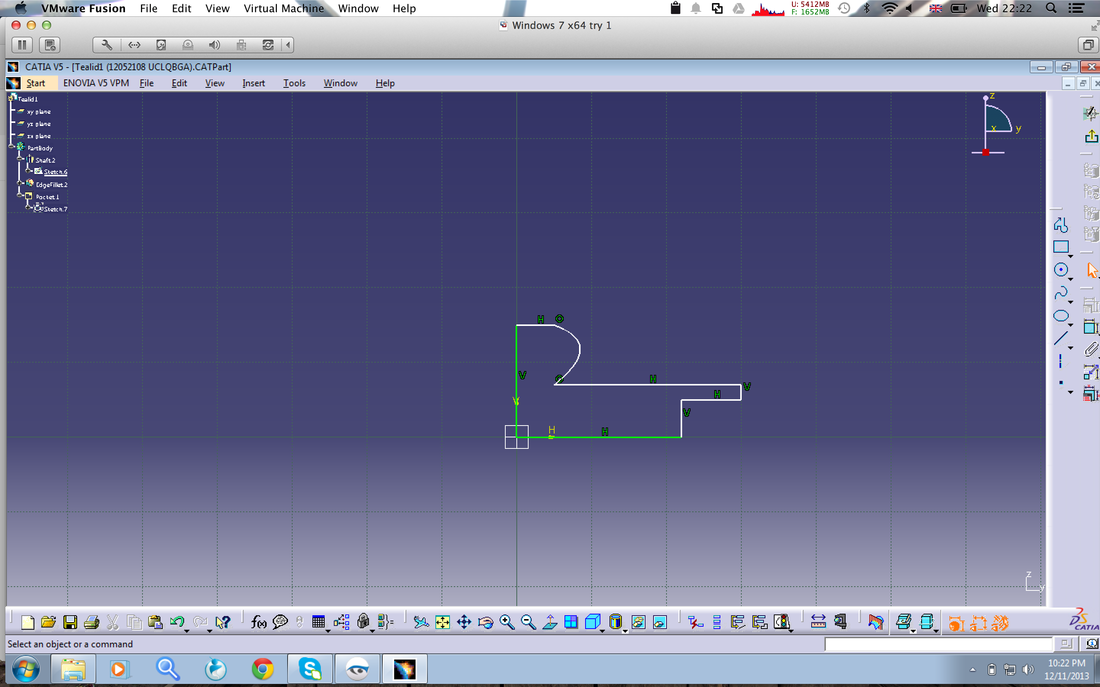
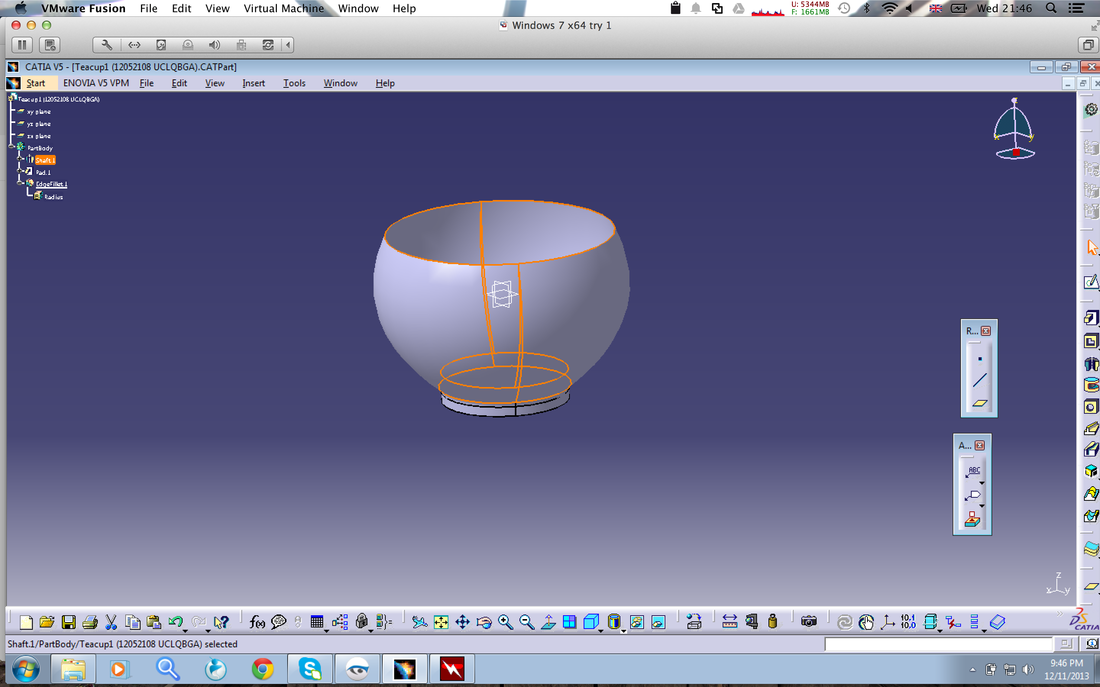
I started by drawing the shape of my teapot.
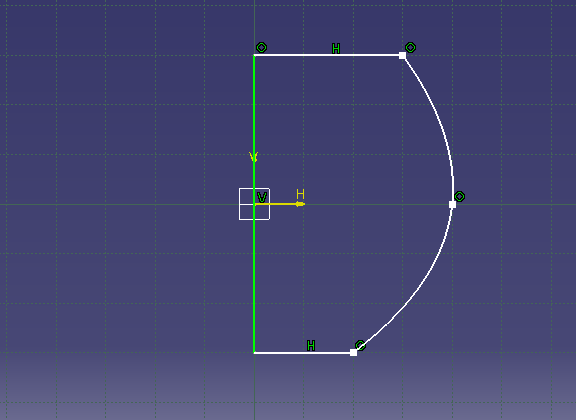
Then, I used the shaft definition feature, to revolve my sketch around the y-axis. This resulted in the following shape below.
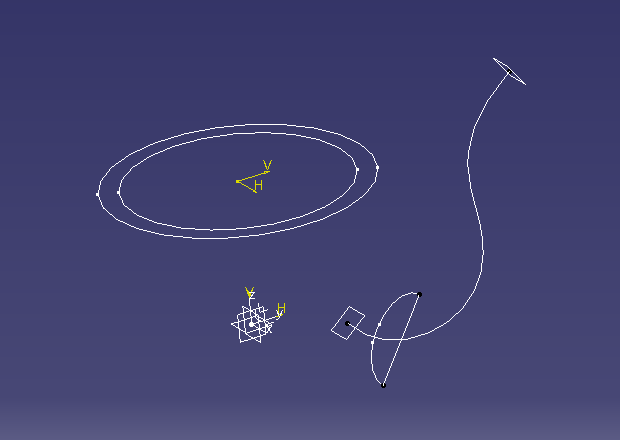
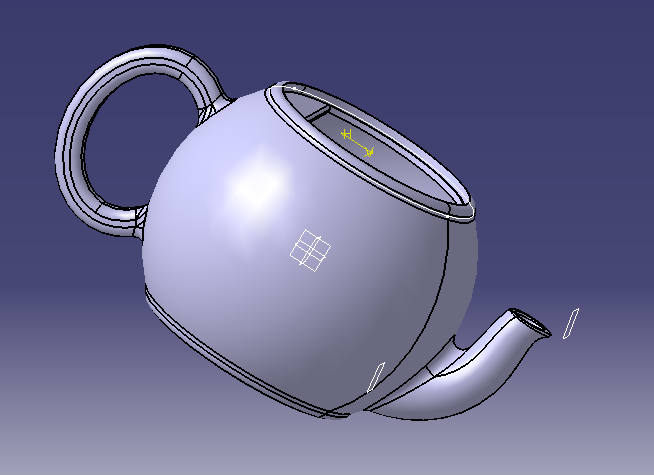
I sketched an elliptical shape for the handle, and used the offset feature to create a smaller copy of that for the inside of the handle. I decided on a thickness of 10mm for my handle.
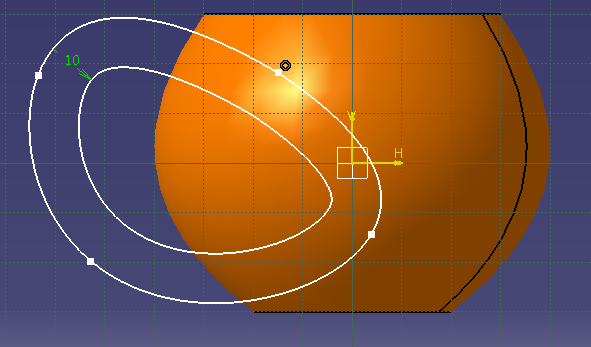
I used these two elliptical sketches to create a three dimensional handle with a width of 1.4cm. Prior to this, I measured some teacups that I could get into my hands. The handles of most teacups are a bit slimmer, i.e. up to 1.2cm. However, I wanted my teapot to look symmetrical. Hence, the handle should have roughly the same width as the spout. Thus, I came up with the width of 1.4cm.
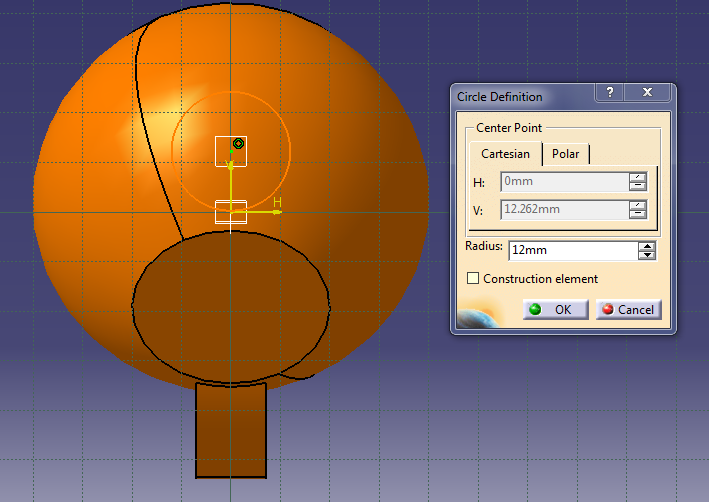
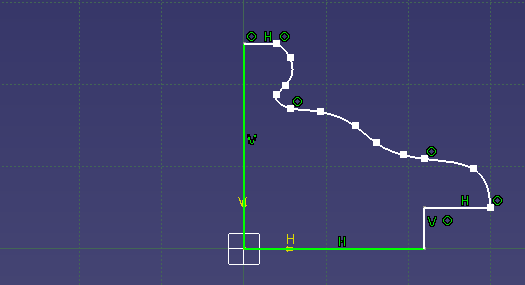
For the shape of the spout, I sketched a multi-point spline. The good thing about using a spline as the skeleton for the spout is that one can easily change the shape of the spout later on, by going back into the spline sketch and dragging the points to different positions. This allowed me to play around with different spout shapes quite a lot later on.
In order to make a solid, three dimensional structure out of the spline sketch, I had to define two working planes at the top and the bottom end of the spline.
I sketched two circles on the two planes. The circle at the bottom end has a radius of 12mm whilst the one at the top end of the spout has a radius of 6mm. Again, whilst creating a 3d model of my teapot, I came back to this step multiple times and changed these figures in order to experiment how this would affect the aesthetics of my spout. Hence, these values were more or less derived from aesthetic experimentation.
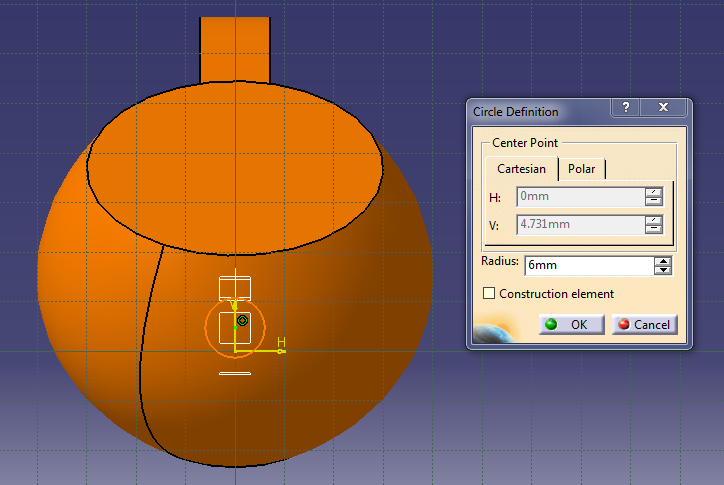
The Multi-Sections Solid Definition feature was used to create a solid spout from the two circles and the spline.

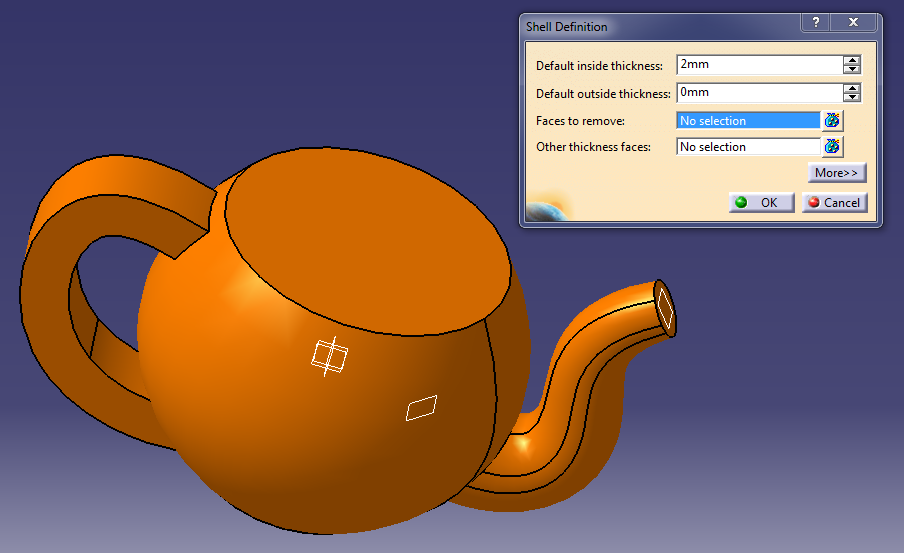
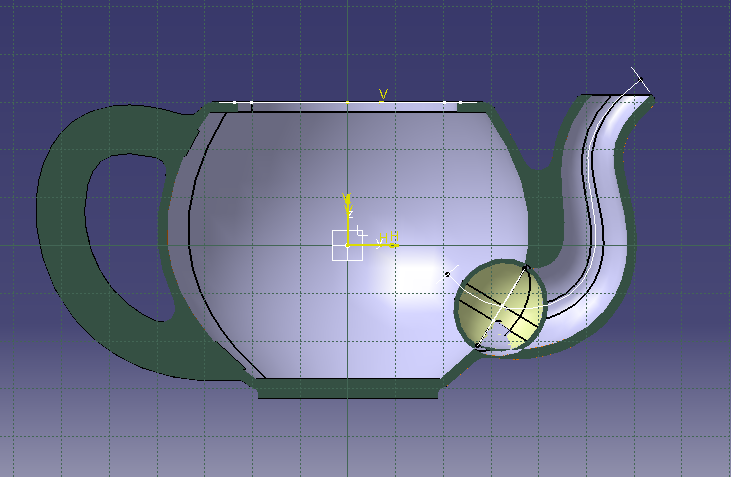
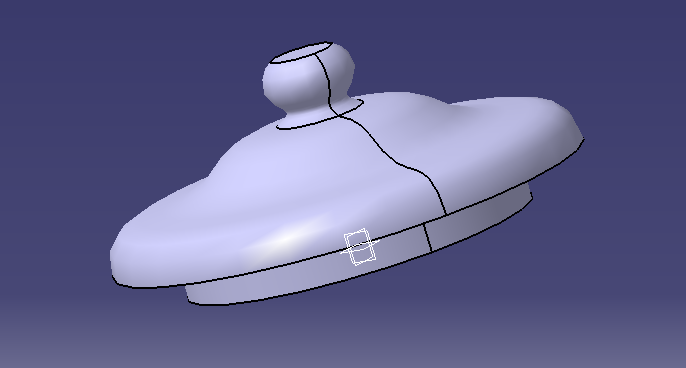
Up until this stage, the teapot was still one solid piece. Using the shell feature on the plane at the end of the spout hollowed out the entire pot (including the handle, a bug that had to be fixed later on).
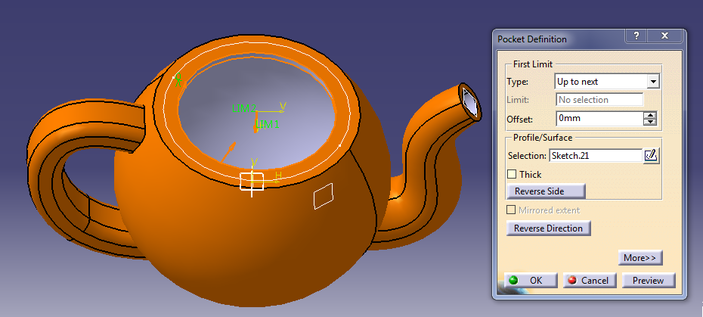
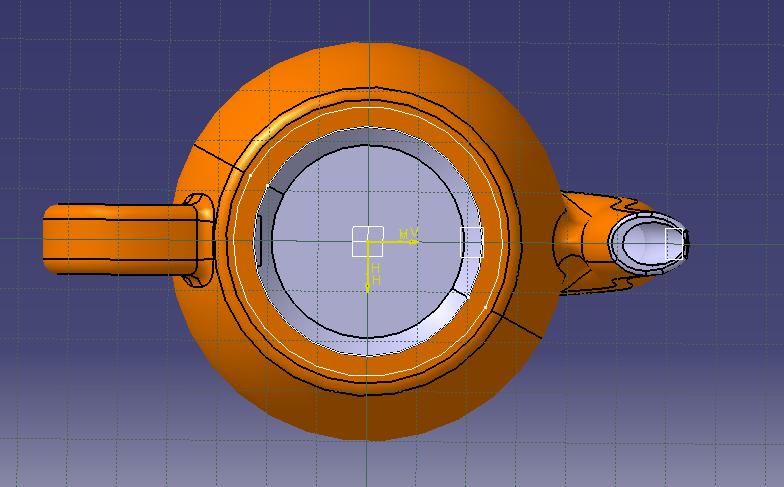
For the opening at the top, I used the top of the body as the sketching plane. The opening has a diameter of 46mm. As one of my design criteria was that the pot should be easy to clean, I did some measurements and found that an opening of 46mm still allows a person to easily grab the tea leaves in the pot by hand. However, the opening could not have been much wider, as the tea pot would have leaked when filled to the top and tilted to pour (see my modelling on this for more information). Finally the pocket feature was used to "cut" the opening.

In between steps, I defined edge fillets to round of the edges. I also used the edge fillet definition feature to join the lower part of the spout and the body. This is for purely aesthetical reasons and serves no practical function whatsoever.

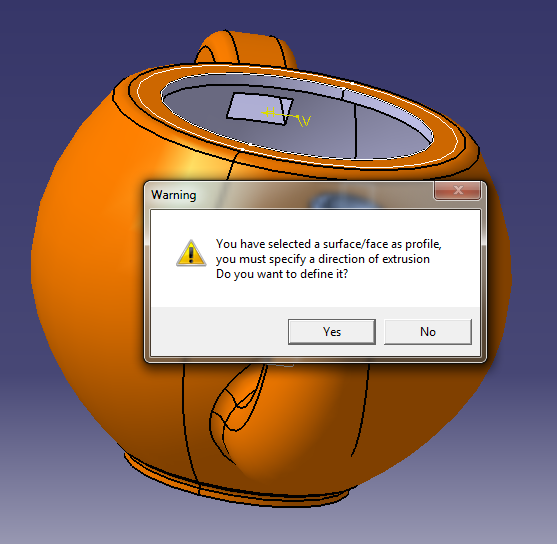
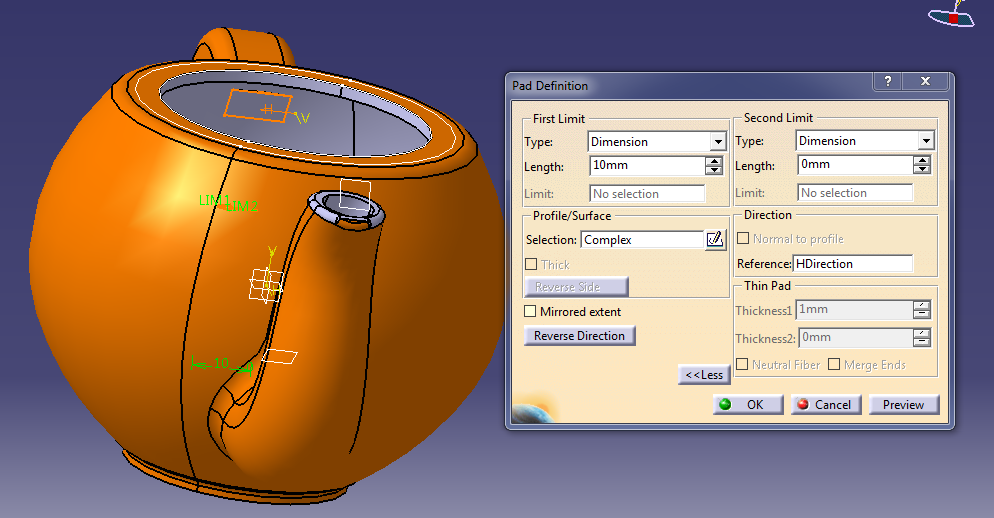
Finally, in order to finish off the spouts top, I sketched a rectangle around where I wanted to cut off the top. I then defined a rectangular solid and used the reversed padding function to cut the lid.
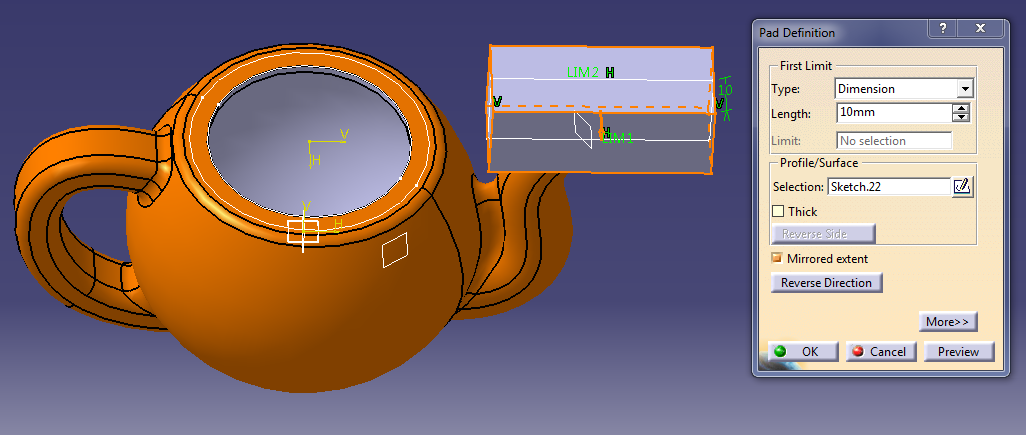
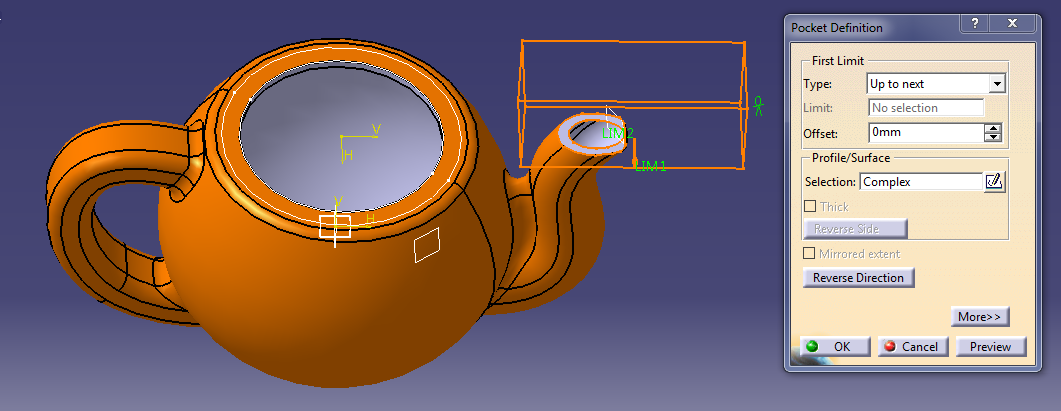
This gave me a nicely oval shaped spout opening with a sharp edge at the spout lip to avert the teapot effect.

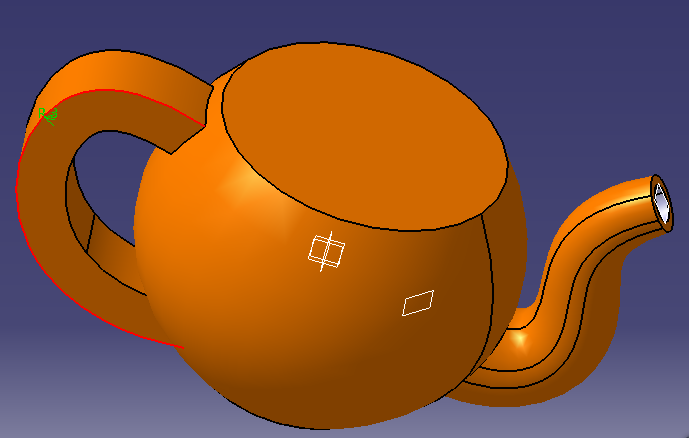
In order to fix the bug with the hollow handle, I selected the inner surface of the handle and padded it 10mm (i.e. 14mm width of the handle minus 2mm thickness of shell on both sides). This filled up the hollow handle.
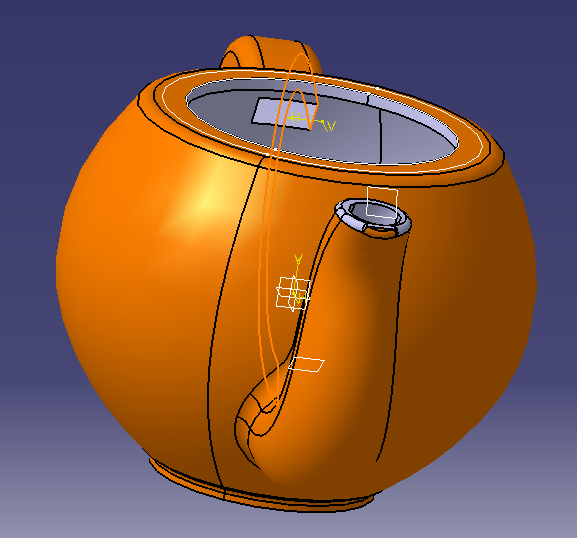
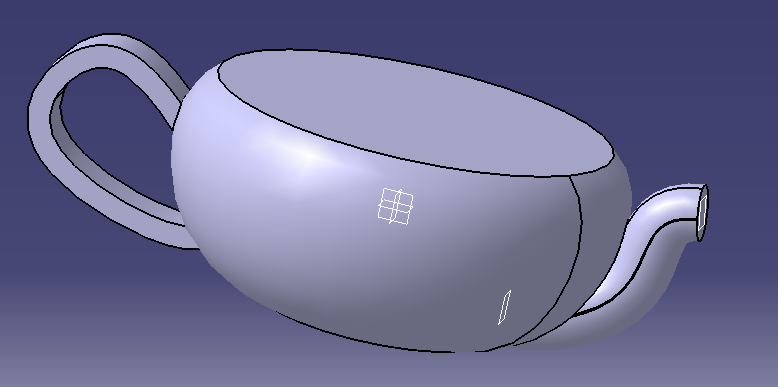
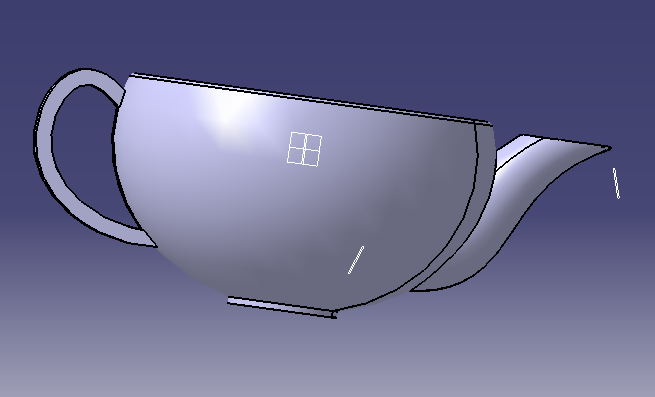
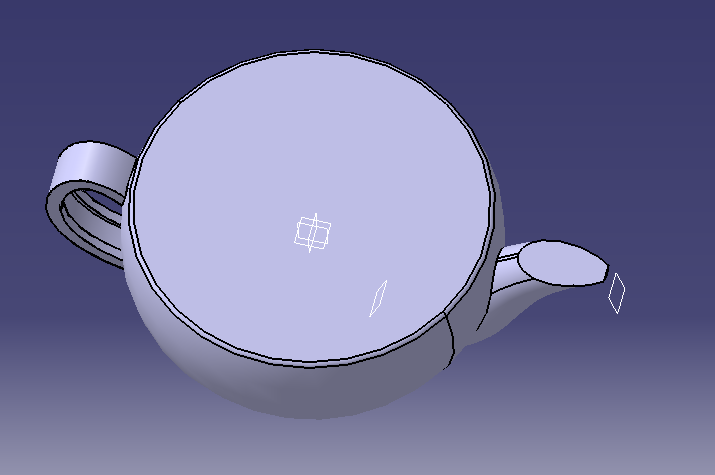
The outside of the teapot was now finalised. However, it still lacked one feature integral to my design: the integrated tea strainer.
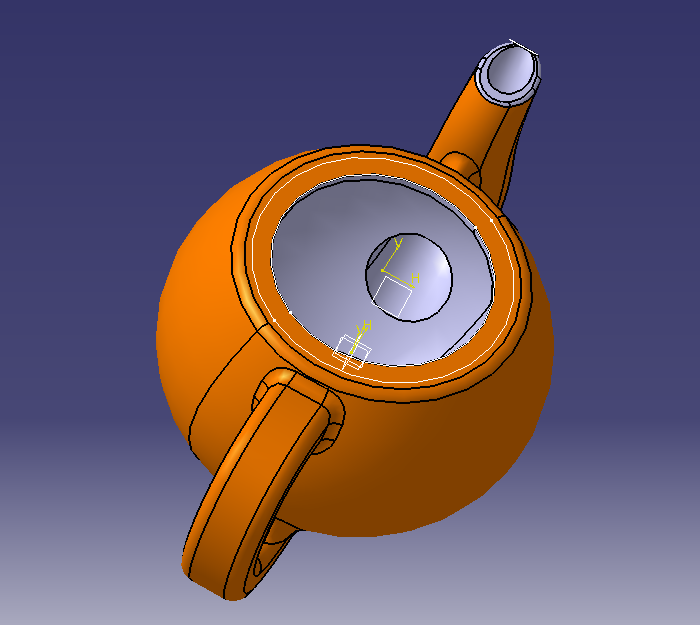
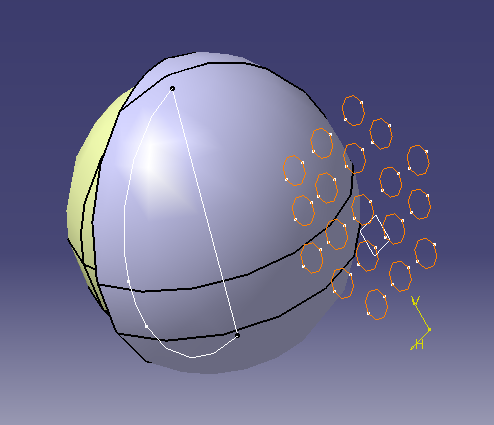
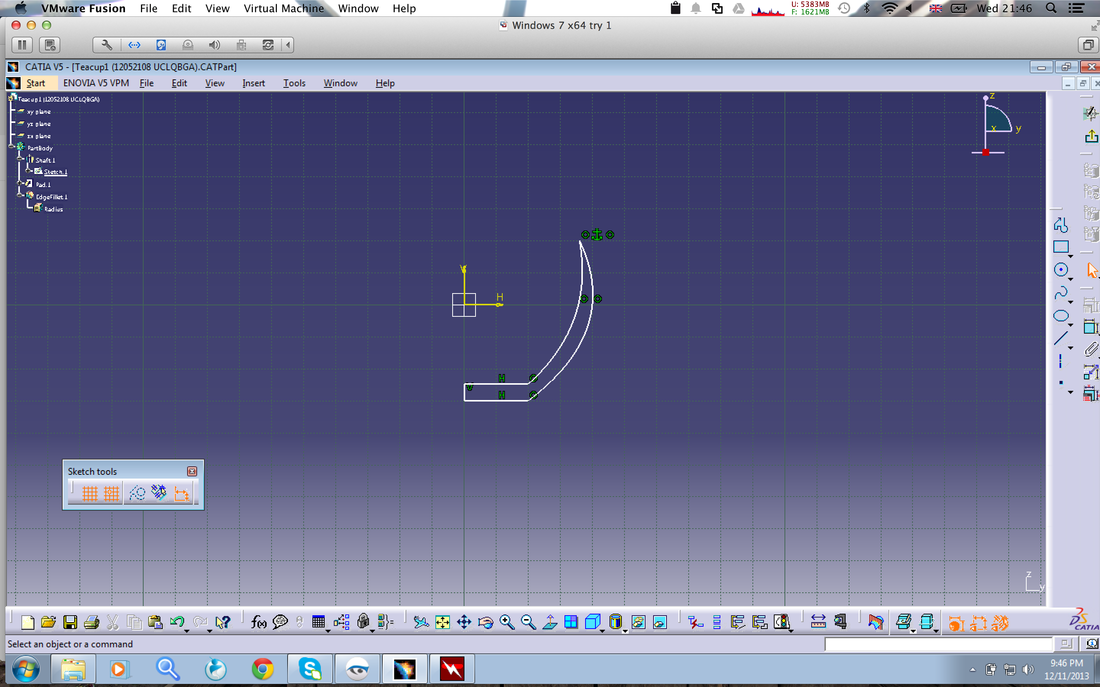
In order to build a filter around the intersection of spout and body, I sketched a half circle around the bottom ending of the spout.
I revolved this demi-circle by 160 degree which created a sphere inside the spout.

I used this sphere to create a hollow ball with a thickness of 2mm.
Then, I used the initial revolution that I used to create the body of the teapot, to slice of the part of the sphere that is inside the spout.
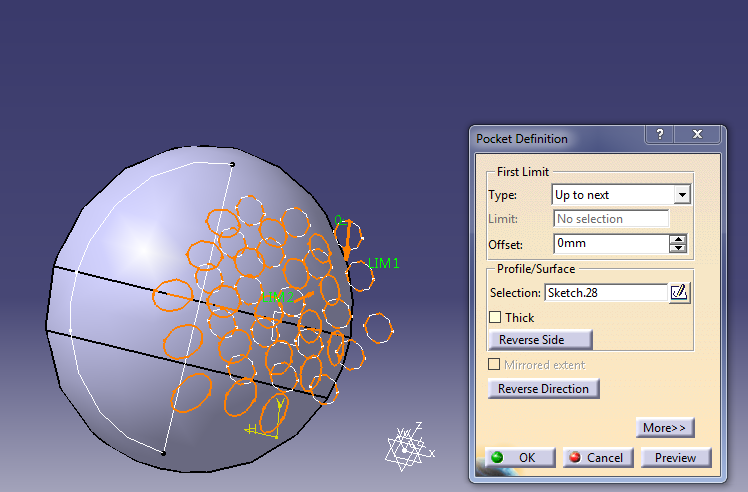
For the holes of the filter, I drew 19 circles with a diameter of 2mm each on a sketch plane positionend parallel to the sphere.
These circles were then projected on the sphere. Via the pocket function, these projections were used to cut wholes into
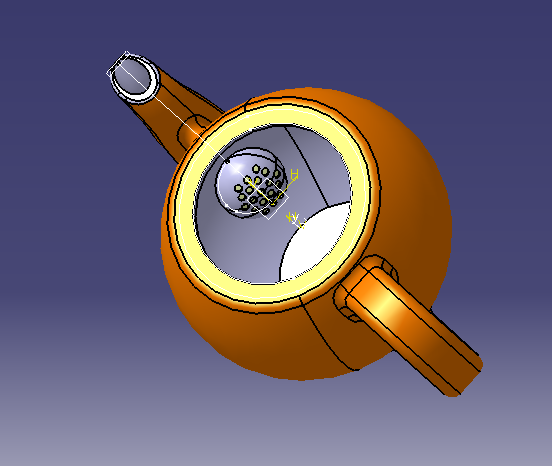
Finally the CATIA body part, which I used to create the filter had to be joined with the body part of the spout (this is a necessairy step in order to render a STL file for 3d printing later on).
The process I explained above describes my design process for the most recent CAD version of my teapot. However, I followed a similar approach for all attempts of 3d moddeling my teapot. See the sections on Failed Attempts below for examples of designs that I omitted or changed.
Making the Lid Part 1
I also created a lid for the tea pot.
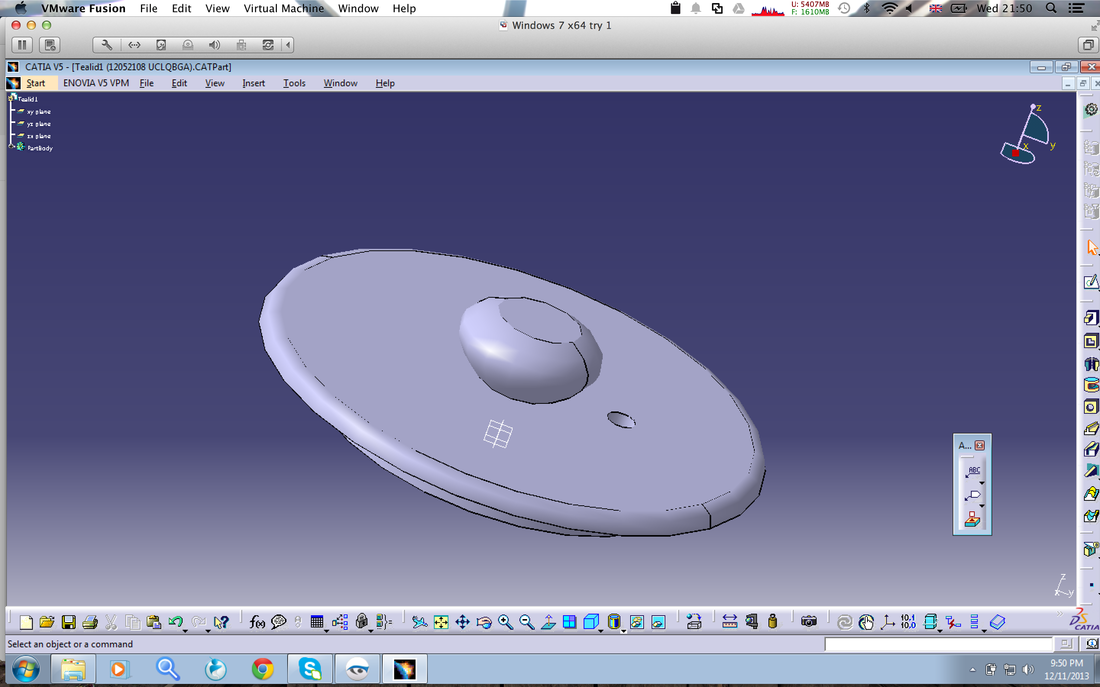
Making the Lid Part 2
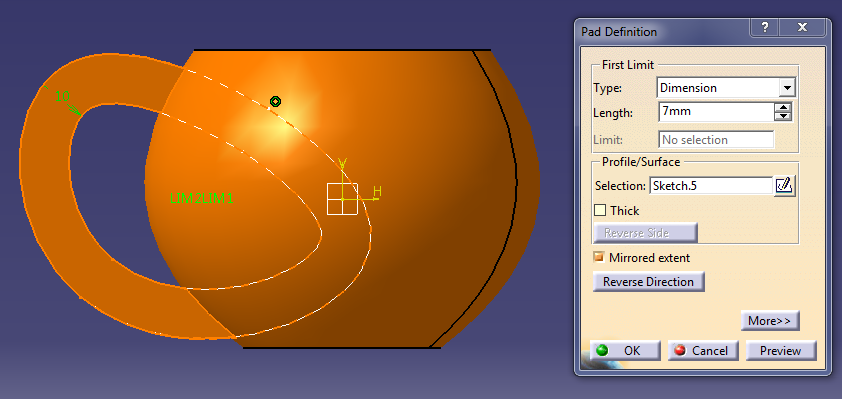
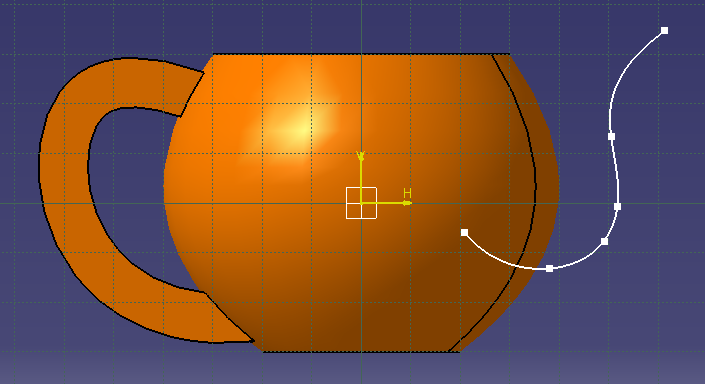
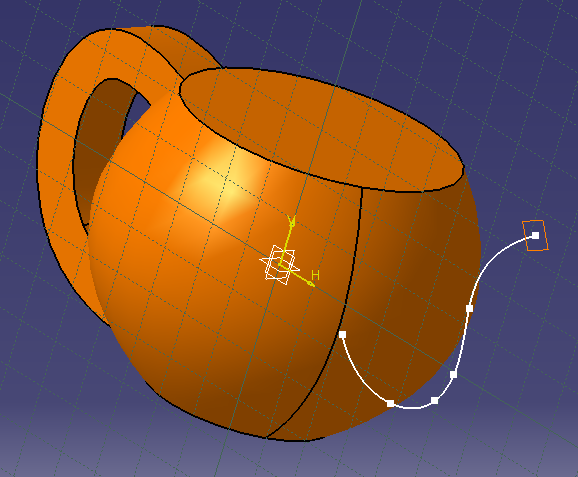
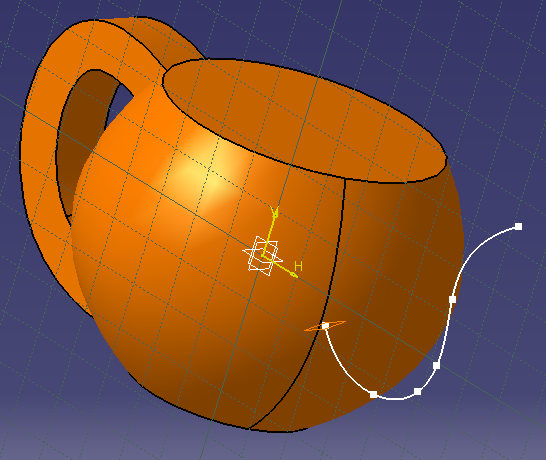
Making a Cup
I created a tea cup that is based on the same shape that I used to create the body of the tea pot. I thought it would be aesthetically pleasing.
I roughly adhered to
I roughly adhered to
Examples of Failed Attempts
As my teapot is supposed to brew exactly one cup of tea, my design was inspired by teacup design. However, the designs below looked to much like squished tea pots. I felt that they would not meet my design brief by not looking classy and "British" enough.
The teapot below is the first 3d model that I created following Tim Baker's tutorial. The volume of the body is way to large to meet my design criteria. Also, the tea spout is too low. If the teapot was to be filled up to the pot, the water would come out of the end of the spout.
I encountered the same problem with the first prototype that I exported from CATIA and 3d printed in the MakerBot. Due to the fact that the opening of the spout is bend, facing forwards rather than upwards, the teapot overflows when it is filled right to the top. Furthermore, the round lip of the spout did not really have the capacity to slice off the stream when pouring, hence, sometimes water drips down the side of the spout. Also, this version did not yet have an integrated strainer. However, I build upon this version to create my final prototype.